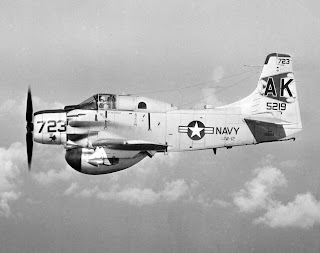
F8U-2NE Crusader of VF-11
The Kit:
This model is the Academy 1/72 scale F-8E Crusader kit (kit No: 1615) with SuperScale decal sheet 72-832 (OOP). The ejection seat is the QuickBoost F-8 Crusader Ejection Seat (QB 72-406) On the F-8, when the wing was raised to increase the angle of attack without raising the nose to maintain pilot visibility the forward and aft flaps were automatically dropped. Academy included the option of raising the wing, but didn't add the option to lower the flaps. The QuickBoost F-8 Crusader 1/72nd scale Flaps (QB 72-269) and F-8 1/72 Slots (QB 72-270) address that issue. (I believe QB meant "slats" not "slots", but that's the package title.) A few construction highlights:
I found two internet pictures of this airplane around the time period of VF-11's first deployment with the F8U-2NE. (Refs 2&3) The Academy kit depicts a Crusader as it evolved during the Vietnam war. Here are the visual highlights of those pictures:
* No missile racks. I thought this was odd. The "Y" ranks were in use during this time period, but least twice this aircraft was photographed without them, so I left them off the model.
* The tail ECM antenna was removed
* The bump on top of the wing was removed. This was added later in production and retrofitted to earlier models. This bump was originally intended to house the Bullpup missile electronics, but the Bullpup proved very unpopular with pilots, so the hump was used for the ECM upgrades. (Ref 2)
* The gray and white paint scheme extends all the way to end of the fuselage.
* No indication of red edges on the landing gear doors
Starting with the cockpit:
My experience with Academy kit decals is decidedly mixed. The forward console decal came apart when placed in the water and wouldn't stick to the painted kit part. I used a console decal from an old decal sheet.
The QB seat was painted and the ejection handles are from a left over Eduard F-4 Zoom set. (Ref 4)
The wings: Here's the flaps cut out:
And the electronics hump removed and smooth out with Tamiya putty and Mr. Surfacer:
When I did a check fit of the QB resin parts I found the forward flaps were too short............#@%$&!
Here's the kit parts compared to resin parts; kit parts are on top :
The white strip illustrates difference in length. I use the QB parts as a guide and filed the proper angle on the back of the kit parts to portray the dropped flaps. (Ref 5)
The rest of the kit went together pretty well. The wheel and brake wells require careful alignment to close the fuselage with no gaps; take your time here and go slow.
There were no issues with the SuperScale decals. I like the overall results!


Comments
Post a Comment
Please keep comments civil and on topic. Any comment can be remove without warning at the discretion of the moderator.