Posts

Hurricane Comin'!

Image
         Long ago when I was between the 6th and 7th grade, I received a Monogram Hurricane kit for my birthday. T his was the first model I built as a replica and not a toy to play with. I guess that was the real start to my life long hobby. Consequently, I've always been fond of the Hawker Hurricane. As time went on, my modeling interest settled on post-WWII aircraft; I was    never much interested in WWII subjects.       But, when I came across a Revell kit visiting a hobby shop, the nostalgia bug bit me!  Along the way I, also, came by an Airfix kit being sold on a modeling forum.  So, here is a Hurricane Mk IID tank buster in a revisit to my first modeling project. The Mk IID is a special release under the "Airfix Club" label and contains the 40mm gun pods.  The Revell kit depicts a Mk IIC in the China, Burma, Indian  theater.      A few comments about this build. Somewhere alo...
Sword FJ-3M Fury

Image
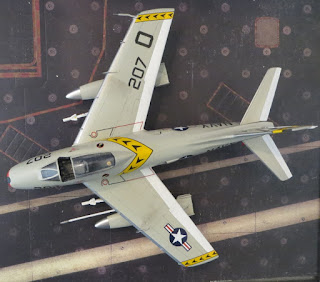
History : "VF-84, initially known as the Vagabonds, was established on July 1, 1955, at NAS Oceana flying the FJ-3 Fury. After deactivation of VF-61 in 1959, VF-84's commanding officer, formerly with VF-61, requested to change his squadron's name and insignia to that of the Jolly Rogers. His request was approved on April 1, 1960. The squadron embarked on the USS Forestall (CVA-59) with CVG-1 in 1957." (Ref 1)  This model depicts an aircraft of that deployment.  The Sword kit of the FJ-3M Fury is a limited-run kit, so some modeling experience is a must to finish this kit. It's a challenging build.  Stipulating that, this kit has quite a bit going for it: finely engraved panel lines, accurate shape and a detailed cockpit. If you want a 1/72 scale Fury, this is pretty much the only injection kit available.  Except for the AIM-9B Sidewinder missile from the Monogram F-4C/D kit, this Fury was built straight out of the box. CALL THE BALL!  RJ References: 1. Seaforces ...

Academy F-4J Phantom II

Image
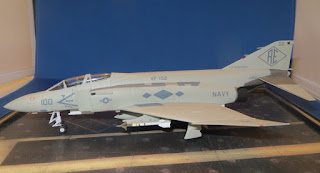
HISTORY:   In June of 1979, Midshipman  RJ Tucker reported to the USS Independence for his summer training cruise. Me and about 100 other midshipmen rotated through the various ship departments and embarked squadrons learning by doing junior officer tasks, drills, ship evolutions and standing watches. I spent a few days with VF-102 one of the 2 airwing fighter squadrons.  I sat in on an intelligence  and a mission  brief, did some maintenance checks with a squadron junior officer, drank their coffee, watched a movie or two, and ate enough for 5 people* in the "dirty shirt" wardroom. This brief insight into naval air culture and routine served me well through my Navy career.   A friend gave me this Academy kit about the same time  I received a Phantom decal sheet from CtA decals. When I saw the VF-102 scheme the memories of  that summer cruise came flooding back! So, here it is with:  * AIM-9s from the Italeri wea...

CORONA Virus Sanity saver (updated: Completed)

Image
The Academy F-4J and Sword FJ-3M Fury (Official US Navy Photograph) (Official US Navy Photograph)   Since we've all been sheltering in place here sunny South Carolina, USA, to avoid the Kung-flu, I've past the time tele-working, working out and building 2 model kits.  The Academy F-4J is my first "press fit" kit. I was a little skeptical thinking it would be like the "snap-tite" kits of my long ago youth. So far, I've been impressed. The fit on the cockpit pieces is excellent, and tight enough it doesn't need glue. Regardless, I've run a little Tenex-7 round the joints.   On the other end of the great modeling continuum, is the Sword FJ-3M Fury. This is a limited run kit with few if any locating pins, fine engraved panel lines & thick parts trees with heavy attachment points. The ejection seat comes in two resin pieces.  First up is the Fury cockpit:  In my kit, the face curtain on the headrest was broken. So, I ...

A-7A Corsair II & an A-7E Corsair II, too!

Image
The Fujimi 1/72nd scale A-7 Corsairs:   Here are my Navy A-7s depicted as Vietnam era aircraft. The Fujimi kits are, pretty much, accurate in shape and in the details. The intake, specifically, has the correct rounded bottom mouth. On the downside, the intake fit is not very good. The intake assembly is just a touch too narrow where it mates to the main fuselage; the hardest circumstance to correct with putty & sandpaper. Several things going on here: I played with some different panel line techniques. After I primed the model with flat white enamel & it dried, I drew in & restored the panel lines with a medium lead pencil on the model scheme that would remain white. Then I went over the flat white with gloss white enamel mixed with 40% paint and 60% thinner. This overcoat produced a simi-gloss finish that wasn't a toy like high-gloss appearance. The translucent overcoat toned down the pencil lines. I was pleased with the effect, but next time I'll used a li...